
Introduction
The goal of this tutorial is to collect valuable Feedback for your e-commerce website. Collecting insights on how to improve the shopping experience and product performance, whilst engaging with your customers and visitors.
The feedback form platform being used is Feedier. Everything in this tutorial can be achieved on the Essentials plan (free).
Feedier is the 1st collaborative Feedback management platform that turns Feedback into action with highly-engaging forms.
There are three workflows that you can set up to collect Feedback efficiently at different moments of the customer journey for your online store:
- Website Feedback: overall experience regarding the UI/UX of your site
- After-checkout Feedback: overall experience regarding the website and checkout funnel
- After-delivery Feedback: product-specific and regarding the delivery
In this tutorial we will focus on the first one, you can find an article regarding the third workflow here.
At the end of this tutorial we will be able to collect daily Feedback on our website, create engagement with loyalty, and get segmented data ready to be used.
Why using Feedier?
- Short engaging and interactive forms
- Loyalty program integrated
- Supports context for better data analysis
Let’s start! ?
Step 1: Create your form
The first step is to create your Feedback form on Feedier. If you do not have an account yet, create it here in 20 seconds.
Then, create the form from the Feedback forms page (figure 1), select a name that suits your shop like “MyWatchShop feedback”. You can also use the eCommerce template available in Feedier to save time and preload questions and satisfaction ratings in the form.
Ratings – measure satisfaction
Define ratings to measure satisfaction metrics in your website, here are 4 examples:
- Product listing
- Speed
- Clarity
- Pricing
Ratings are very important because they let you measure an accurate pulse of satisfaction on your website. The four defined are examples, change them but make sure you have less than 6. Otherwise, the visitor will get bored right at the beginning. Which is no good.
Questions – get insights
Here comes the part where you get insights about how to improve your website and checkout experience: the Questions.
As a rule of thumb:
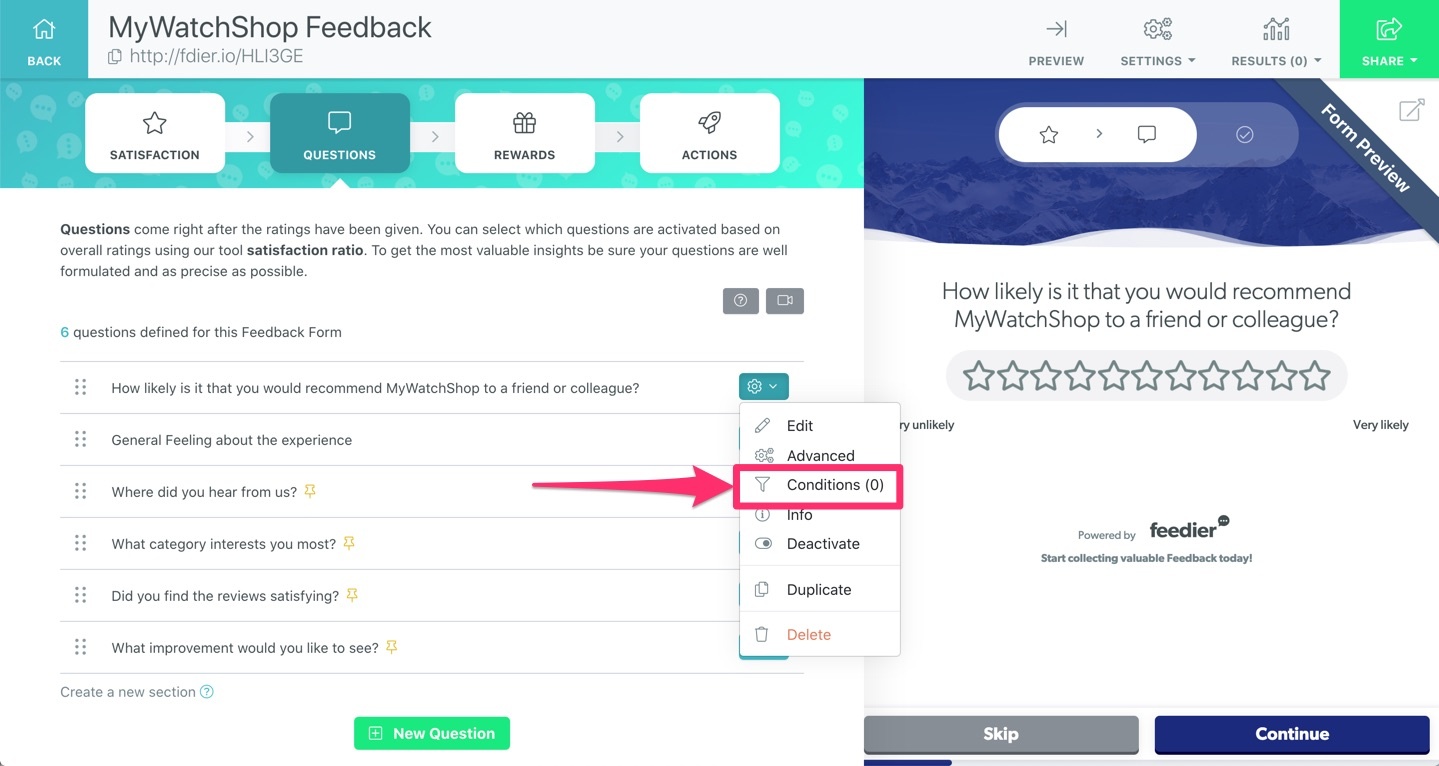
- Use logic conditions to ask the right question to the right participant (Figure 2).
- Avoid text questions except for the last one and make sure it is not required and can be skipped. Text questions lower the completion rate and are hard to analyze with charts.
- Limit to 10 questions.
- Use GIFs and nice descriptions to make the question interactives and clear (Figure 2).
Learn more about creating gamified experiences in this article.
The four questions in this example are:
- What’s your general feeling on our website? (Smileys question type)
- Where did you hear from us? (Choice question type: Instagram; Facebook; A friend; A colleague; Google)
- How likely is it that you would recommend MyWatchShop to a friend or colleague? (NPS question type)
- What category interests you the most? (Choice or image question type)
- Did you find the reviews satisfying? (Switch question type)
- What improvement would you like to see? (Optional text question type)
Rewards – create loyalty
Are you looking to create secondary purchases through loyalty schemes or perhaps just need more responses?
Use the Feedier reward manager to create a simple reward program.
- In your eCommerce shop manager, generate one or several coupons of an amount that suits you depending on the average order value.
- In Feedier, create a new reward (Figure 3) and select “Coupon”, you can also upload a .CSV containing several unique coupons that will be distributed automatically by Feedier.

When configuring this Coupon reward:
- The “Name” is visible to the end-user
- The “Description” is visible to the end-user and can be used to explain how to use the reward.
- The “Probability” is the percentage of getting that reward when giving a Feedback. Your choice, you can for example have 5% which means for every 100 entries, you give 5 coupons away.
- The “Distribution Limit” is the maximum number of rewards that can be issued. So if your coupon can be used 5 times max, set it to 5.
- The “Code” (last step) is where you input the coupon ID that will be sent to the participant if he wins.
This step is of course optional.
Actions – no dead-ends
Lastly, we can add an action to our form, the goal of the action is to not lead the participant to a dead-end after the form is over. In this tutorial, we will collect fresh testimonials from happy visitors and customers (Figure 4). Note that you can also collect subscribers to your newsletter or 5-star reviews for your products automatically.
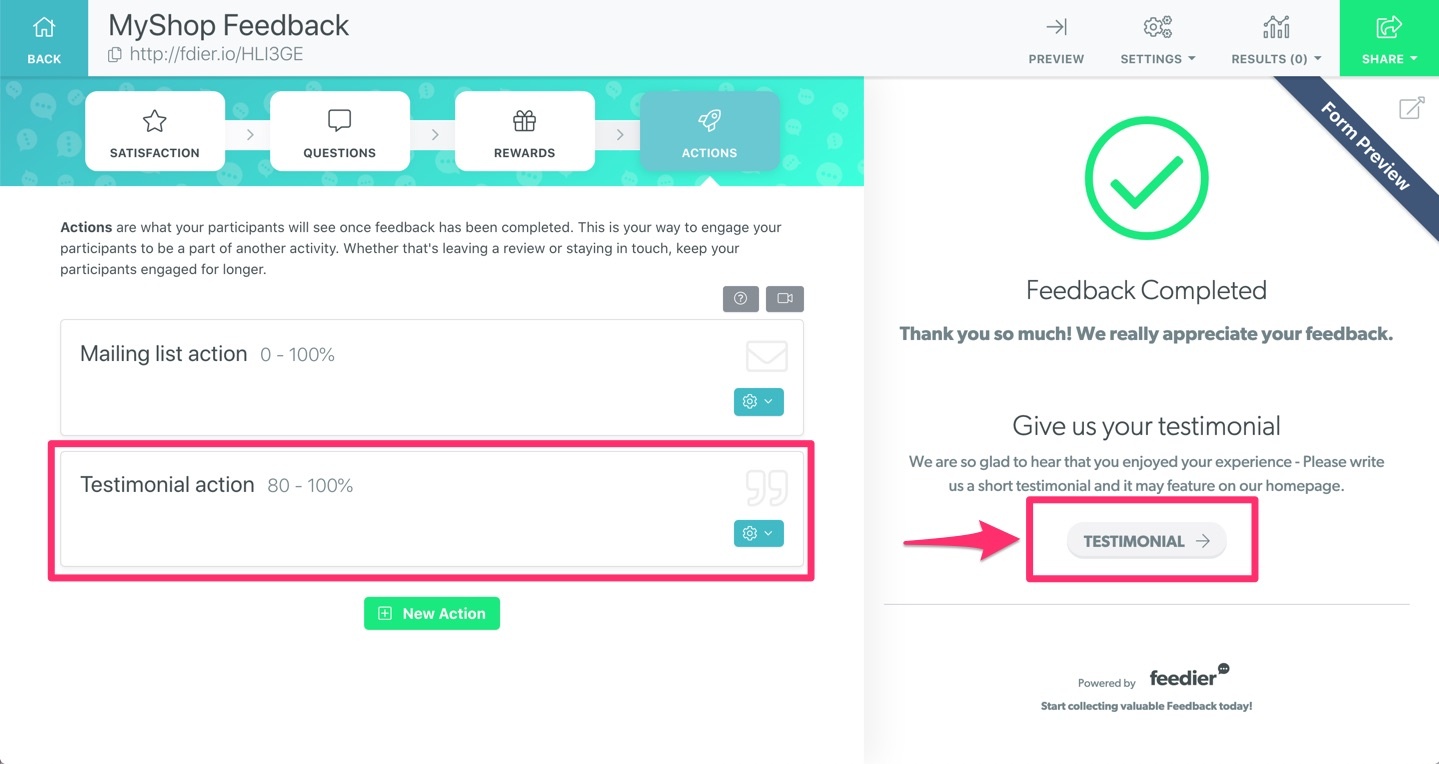
What are we missing? Testing. It’s really important to make sure the form is as quick and engaging as possible. You can try the “Preview” mode (Figure 4) in the form builder to test the form and the different scenarios with no data recorded.
Step 2: Integrate a dynamic widget
One way of getting Feedback is to send automated emails after an order is completed through Zapier (connect Feedier with your eCommerce shop manager: WooCommerce, Shopify, Magento..0). Another way, which as promised earlier in this article we will tackle, is to have a widget showing up on your site. The success factors of that widget are:
- A clear message
- Mentions average timing
- Mentions reward (if any)
- Stays on your site
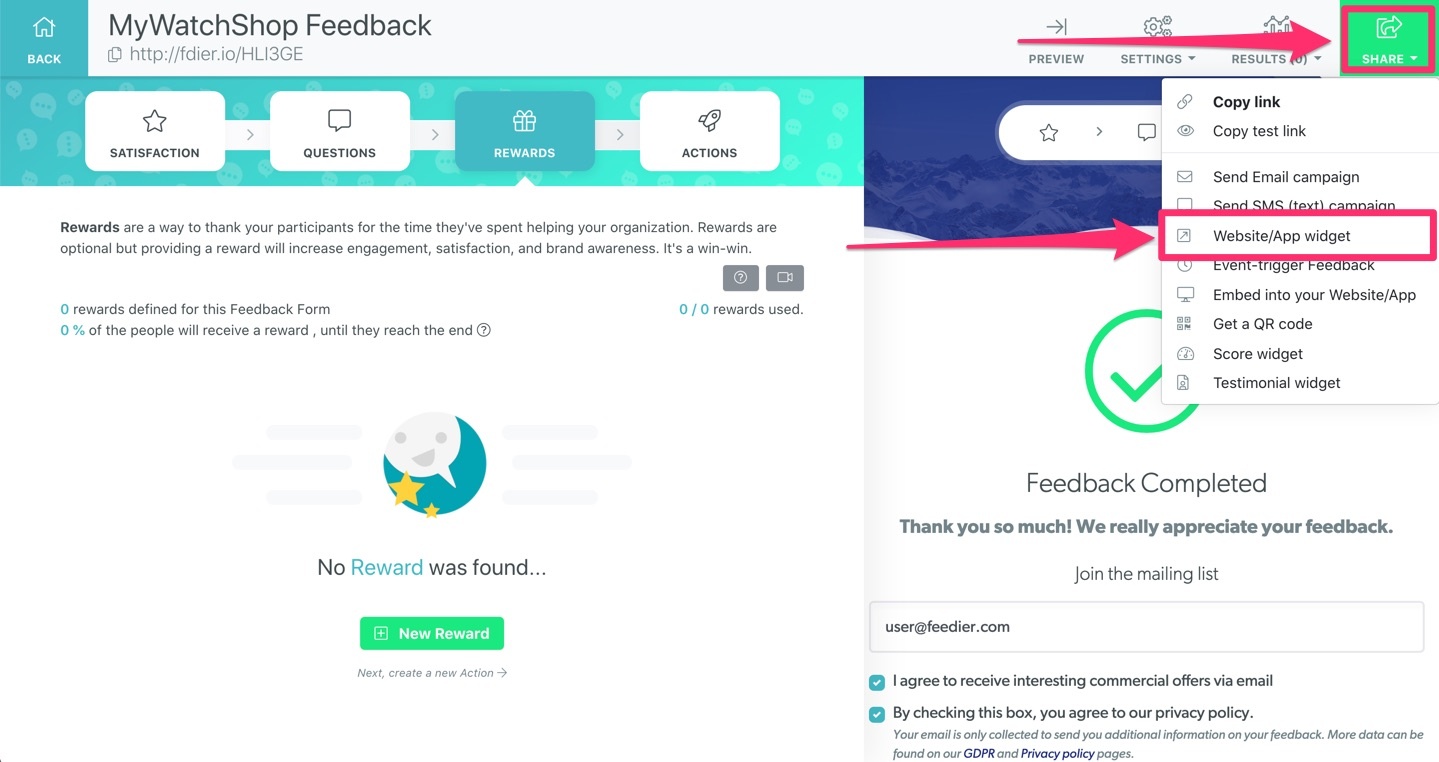
How do you add it? It’s super easy! Heads toward the form builder and click share then “Website/App widget” (Figure 5):
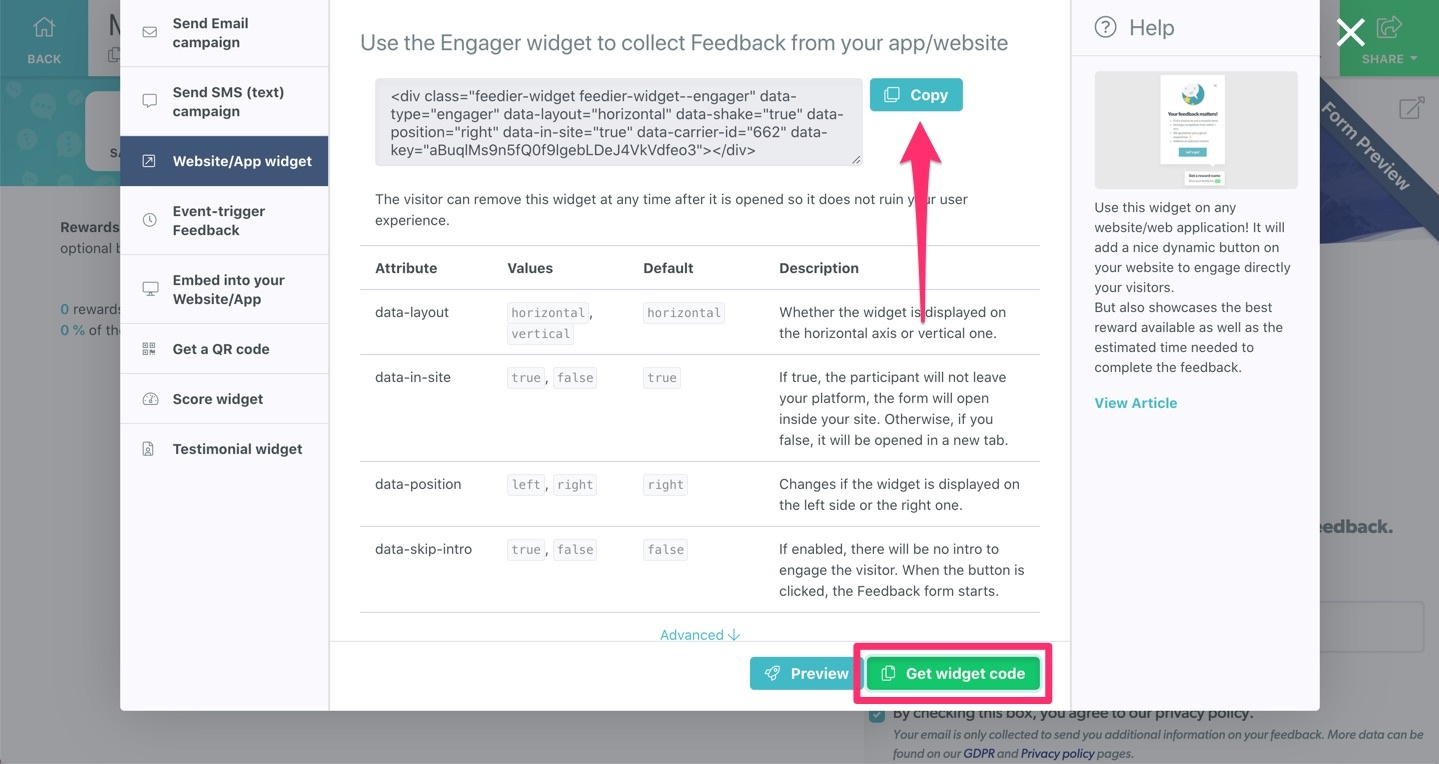
Then, hit the “Get Widget Code” button (Figure 6). The widget is already pre-configured for you and can be personalized with up to 10 options (position, size, context, message).
Where to copy it? Good question! Well, depends on your eCommerce store manager, but you want to have it inserted at the end of the pages where you want the widgets to show up. In the HTML.
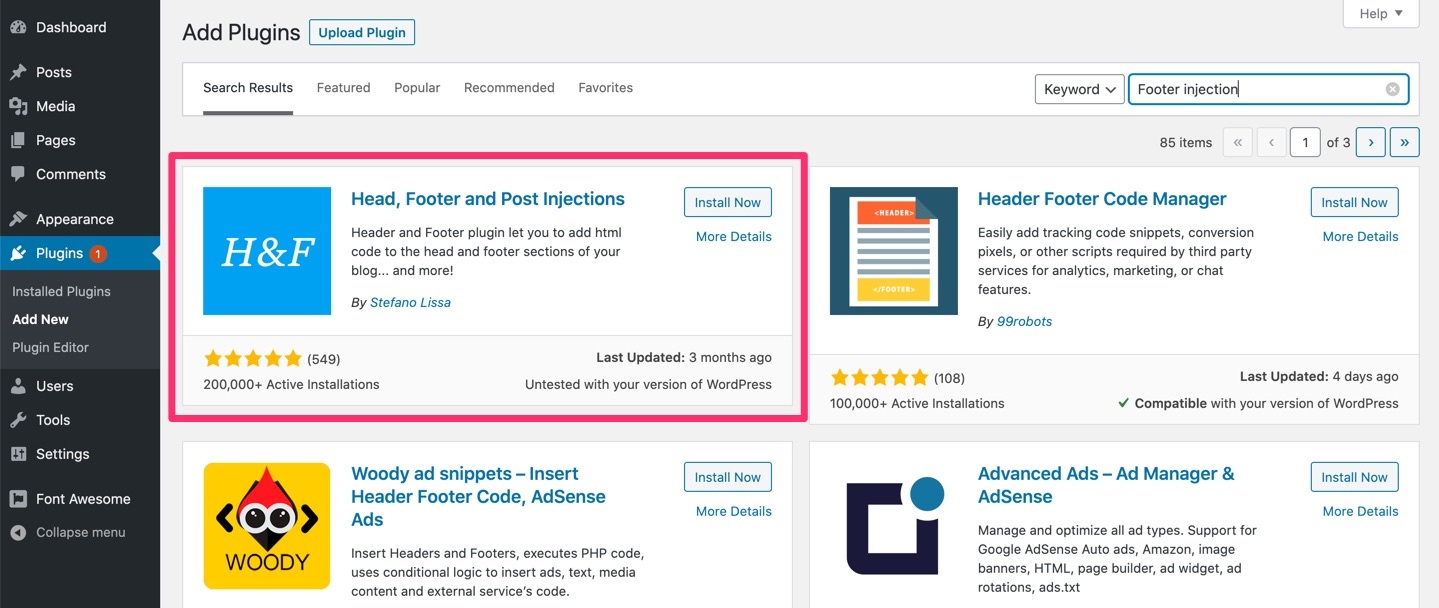
An example in WordPress for WooCommerce would be to either edit your child theme or use a plugin like “Head, Footer and Post Injections” (Figure 7), that will let you add custom HTML (Feedback widget) at the bottom of your page, safely.
You can also use a solution like Google Tag Manager to apply personalized rules and take care of the integration for you.
Note that the Feedier Feedback widget supports JavaScript events, so if you have a developer in your team, you can trigger the widget with your own rules. Learn more about the widget.
Step 3: Analyze the results
A couple of days after the integration, you will start receiving your first Feedback.
Wait 7 days before doing your first analysis to make sure the data starts to be representative. Head to the “Data Insights” tab in the Feedier Dashboard to get a full list of reports on every question you’ve asked. Here are some advanced resources to get the most out of the data you collected and take action:
- Data insights tutorial
- Filtering data
- PDF report
- Assign Feedback